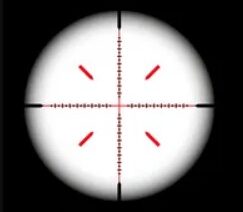

The right red dot system isn’t about the optic; it’s about the setup. Your red dot’s elevation may make a big difference in your sight picture, particularly when using backup iron sights. This is where Absolute vs lower 1/3 co-witness explained comes into play. Both setups can use a red dot in conjunction with the iron sights, but the iron sights are in a different spot in the optic’s view.
If you’re a new buyer, the distinction can be confusing, especially when it comes to mounts, risers, and red dot sights. Ultimately, it comes down to your sight picture, your equipment setup, and how you plan to use your setup.
We’re going to cover the difference between absolute vs lower 1/3 co-witness and the pros and cons of each, as well as discussing factors to consider when selecting a compatible red dot and mount.
We’ll also be discussing some of the more popular choices for optics and some common questions to help you make a better buying decision.
“This post contains affiliate links. If you purchase through these links, I may earn a small commission at no extra cost. Learn more here.”
Best Red Dot Sights for Absolute Co-Witness
| SIG Sauer ROMEO5 | 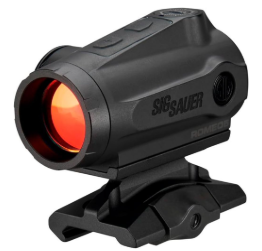 |
|
| Holosun HS403B | 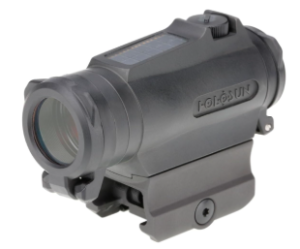 |
|
| Aimpoint PRO | 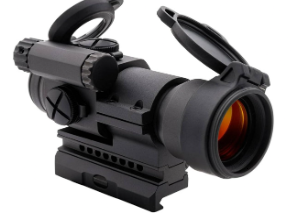 |
|
| Vortex Crossfire Red Dot | 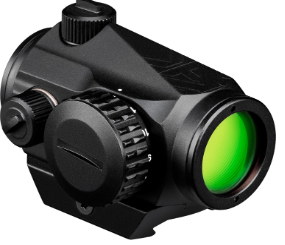 |
|
| Primary Arms SLx MD-25 | 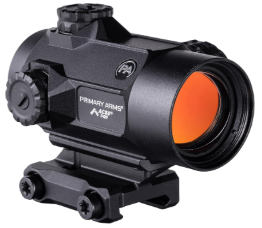 |
|
Comparison Table
| Red Dot Sight | Best For | Reticle | Battery Life | Mounting / Co-Witness Notes |
|---|---|---|---|---|
| SIG Sauer ROMEO5 | Best value | 2 MOA dot | 40,000+ hrs | Certain ROMEO5 configurations include a 1.41″ absolute co-witness riser. |
| Holosun HS403B | Best budget option | 2 MOA dot | Up to 50,000 hrs | Includes a 1.63″ lower 1/3 mount, so an appropriate absolute-height mount would be needed for an absolute setup. |
| Aimpoint PRO | Best rugged option | 2 MOA dot | 30,000 hrs | Comes with QRP2 mount and spacer; optical axis is 39 mm (1.5″) above the mechanical interface. |
| Vortex Crossfire Red Dot | Best versatile option | 2 MOA dot | Check current configuration | Compact red dot designed for rifles, shotguns and rimfire platforms; mount height should be selected separately for the desired co-witness. |
| Primary Arms SLx MD-25 | Best larger viewing window | 2 MOA dot / available reticle options | Up to 50,000 hrs | Includes mounting options for different heights, allowing the user to configure the optic for the desired sight relationship. |
Best Red Dot Sights for Lower 1/3 Co-Witness
| EOTech EXPS3 | 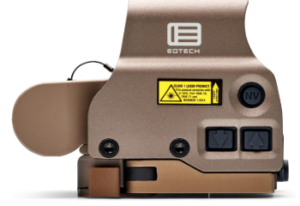 |
|
| Trijicon MRO | 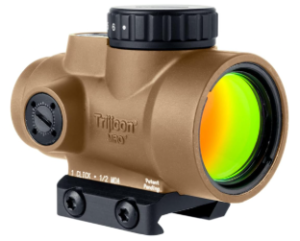 |
|
| Holosun HS510C | 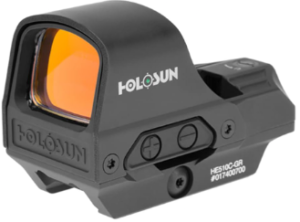 |
|
| Aimpoint Micro T-2 | 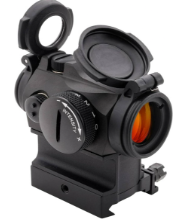 |
|
Comparison Table
| Red Dot Sight | Best For | Reticle | Battery Life | Lower 1/3 Co-Witness Notes |
|---|---|---|---|---|
| EOTech EXPS3 | Best premium holographic optic | Multiple reticle options | Approx. 1,000 hrs | Built with a 7 mm raised quick-detach base specifically for lower 1/3 iron-sight co-witness. |
| Trijicon MRO | Best large viewing window | 2 MOA dot | Up to 50,000 hrs* | Can be paired with a dedicated lower 1/3 mount; the mount height determines the final co-witness position. |
| Holosun HS510C | Best value / large window | 2 MOA dot + 65 MOA circle | Up to 50,000 hrs | Includes an absolute co-witness QD mount; a separately available 1.63″ spacer provides lower 1/3 height. |
| Aimpoint Micro T-2 | Best premium compact option | 2 MOA dot | Up to 50,000 hrs | The optic can be paired with dedicated lower 1/3 mounts; Aimpoint also lists configurations with different spacer heights. |
What Is Co-Witnessing?
Co-Witnessing is defined as the position of a red dot sight and backup iron sights (BUIS) when viewed through the optic. If a firearm is set up correctly, the iron sights are not all the way out of position but can be used through the optic.
The two most popular layouts are an absolute witness co-witness and a lower 1/3 co-witness, referring to the position of the iron sights on the red dot’s line of sight. The most significant difference is the height of the optic and of the mount.
Decision as to which to use rests with your preferred sight picture and optic set-up, as well as the positioning of the backup sights, either in the center of the optic or below the optic in the optic window.
Absolute Co-Witness vs Lower 1/3 Co-Witness
There are two popular methods for using a red dot sight with backup iron sights: absolute co-witness and lower 1/3 co-witness. The difference is that the iron sights are visible at a different position when looking through the optic.
Absolute co-witness will have the red dot and iron sights lined up in the middle of the optic window. The red dot will be directly over the front sight post when you have a proper sight picture with your iron sights.
This configuration allows for quick movement from optic to iron sights, and is favored by shooters who prefer a smooth and predictable transition between these two types of sighting systems.
Lower 1/3 co-witness means the optic is mounted slightly up. This also means that the iron sights are not in the center of the optic window but in the lower third. This helps to provide a cleaner sighting through the red dot, enabling target acquisition to be completed quickly while retaining the iron sights for backup, if necessary.
There is no right or wrong answer. Absolute co-witness is a familiar and centered sight picture, and lower 1/3 co-witness is a good option for getting rid of the iron sights in the field of view when in use. This depends on your preference, shooting style, and optic setup.
What Is Absolute Co-Witness?
Absolute co-witness is a red dot sight setup where the backup iron sights align through the center of the optic’s viewing window. When you look through the red dot, the front and rear iron sights appear directly in line with the center of the optic.
This creates a consistent sight picture between the red dot and iron sights. One advantage is that the iron sights are immediately visible and can be used as a reference if the optic becomes unavailable.
Typically requires a specific optic and mount height designed for this configuration, so compatibility should be checked before purchasing.
What Is Lower 1/3 Co-Witness?
Lower 1/3 co-witness is a red dot sight setup where the backup iron sights appear in the lower third of the optic’s viewing window rather than directly through the center.
The higher mounting position keeps the iron sights available as a backup while leaving more of the central viewing area unobstructed during normal use. Many users prefer this arrangement because it provides a cleaner sight picture through the red dot.
Absolute vs Lower 1/3: Which One Should You Choose?
The decision between absolute and lower 1/3 co-witness is almost entirely a matter of personal preference and what sights you believe provide the best sight picture, optic height, and placement of your backup iron sights.
For both configurations, there’s a way to ensure that the iron sights can stay with the red dot for a reliable sighting option.
Absolute co-witness might be a good option for you if you like a straight, centered view with the weapon. The iron sights are visible through the optic window, giving an alignment of the red dot and iron sights.
If you prefer to have less obstruction from the iron sights in the center of the optic window, it may be better to use a lower 1/3 co-witness. In this setup, the backup sights are located at the bottom of the scope’s viewing window, and the red dot is the main reference.
Some factors to take into account when making a choice are your optic, mount height, backup sights, and personal preference. Always verify the co-witness height is suitable for the specific optic and mount combination, as not all optics and mounts will give the same co-witness height.
Many people will want to pick the setup which gives them a comfortable sight picture and which is correct with the gear they already have.
How Mount Height Affects Co-Witness
Mount height determines where your backup iron sights appear within the red dot’s viewing window. With an absolute co-witness setup, the optic is positioned so the iron sights align around the center of the viewing window.
Raising the optic with a taller mount or riser can move the iron sights toward the lower portion of the window, creating a lower 1/3 co-witness configuration. The exact height required depends on the optic, mounting system, platform, and backup sights.
Before purchasing a mount, check the manufacturer’s specifications to confirm compatibility and the intended co-witness height for your specific setup.
Best Co-Witness Mounts for Absolute and Lower 1/3 Setups
Choosing the right co-witness mount is important because mount height determines where the backup iron sights appear through the optic.
Absolute co-witness mounts position the optic so the irons align near the center of the viewing window, while lower 1/3 mounts raise the optic slightly and place the irons toward the bottom of the window.
When comparing mounts, look for the correct optic compatibility, mounting height, construction, weight, and attachment system. Some manufacturers offer the same mount design in both absolute and lower 1/3 configurations, making it easier to choose the sight picture you prefer.
FAQs
- What is the difference between absolute and lower 1/3 co-witness?
Absolute co-witness places the backup iron sights around the center of the red dot’s viewing window. Lower 1/3 co-witness positions the iron sights in the lower portion of the window, leaving more of the central view unobstructed.
- Is absolute or lower 1/3 co-witness better?
Neither is universally better. Absolute co-witness provides a centered sight picture, while lower 1/3 can provide a less obstructed view through the optic. Your preferred setup, optic, mount, and backup sights should determine the choice.
- What height mount do I need for absolute co-witness?
The required height depends on the optic, firearm platform, and backup iron sights. Always check the optic and mount manufacturer’s specifications rather than assuming one height works with every setup.
Final Thoughts
Absolute and lower 1/3 co-witness setups both provide a way to use a red dot alongside backup iron sights, but they create different sight pictures. Absolute co-witness places the iron sights around the center of the optic window, while lower 1/3 co-witness positions them toward the lower portion, leaving more of the central viewing area open.
Neither configuration is automatically the best choice for everyone. Your decision should take into account your optic, mounting system, backup sights, preferred sight picture, and the specific platform you’re using. Before purchasing a mount or riser, always check the manufacturer’s specifications to ensure the components are compatible and provide the intended height.
Whether you’re comparing red dots, mounts, or complete setups, focusing on compatibility rather than simply choosing the most popular configuration will help you build a setup that meets your needs.
With a clear understanding of the differences, choosing between absolute and lower 1/3 co-witness becomes much easier.
Also check out: